How to paint the easiest fall birch trees
Share
there was a brief moment when I thought fall had arrived. I could happily wear a sweatshirt outside, leaves started appearing on the grass, and pumpkin spice lattes joined the coffee shop menus.
But Minnesota decided to say “not yet!” and now it's hot and all the trees are still green and I'm back to my iced chai.
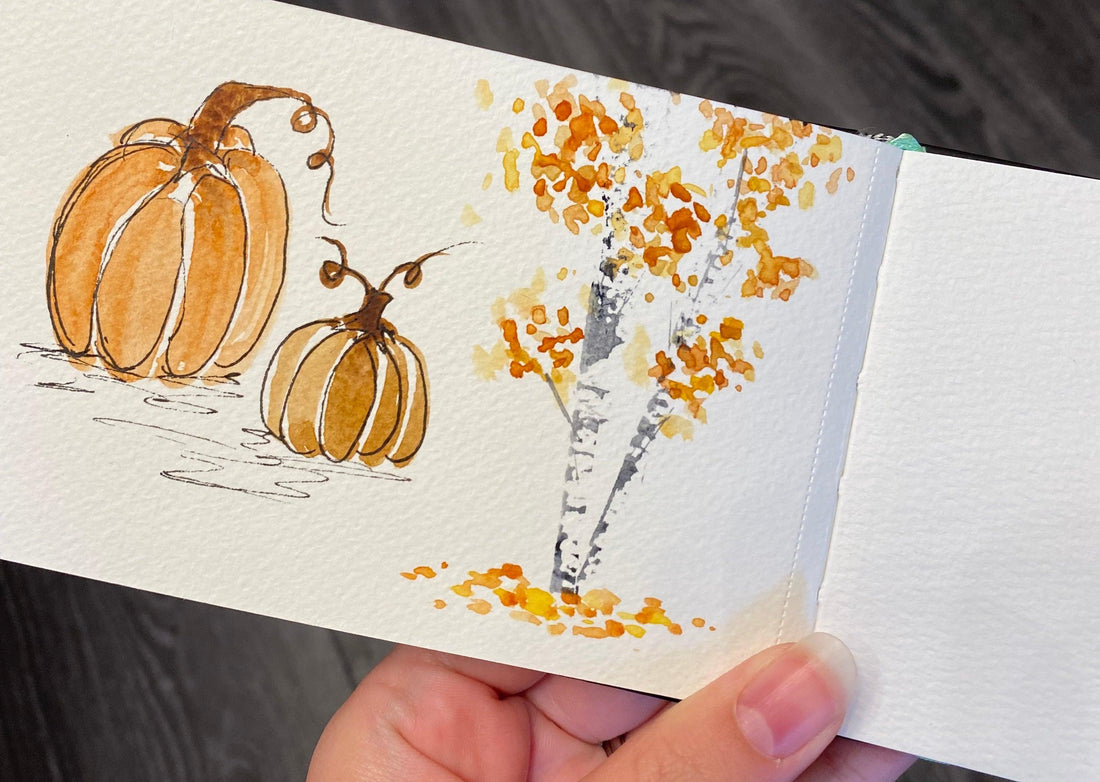
Even so, as a part of my recent decision to paint random little things (nearly) daily and share them on instagram, I painted some pumpkins and fall birch trees.
Apparently, the rest of you love to paint fall things too because my birch trees have really resonated! Check it out as this week's tutorial...
Fall or not outside, it's time I share how to embrace the autumn beauty with the easiest fall tree painting.
Using Negative Space
Birch trees have mostly white tree trunks, which can prove difficult to paint in watercolor since we don't use white.
Instead of painting with white, we paint around things we want white and let the paper show.
Birch trees also have a textured bark which would not be achieved with the smoothness of a watercolor brush stroke.
Using a Non-Traditional Painting Tool
So we won't use a watercolor brush. Instead, we're going to use a plastic card.
Think gift card.

Wake up some black watercolor paint and brush it on the edge of the card or dip the edge of the card in the wet paint.
Scrape the edge of the card against the paper and BOOM instant birch tree trunk!
Do this a few times to create a clump of trunks like there often are.
To finish the trunks, pull the edge or corner of the card through some wet paint away from the trunk to make some skinny branches.
Painting Autumn Leaves
Now that we have a trunk let's add some leaves. With fall colors of course.
The easiest way to paint succesful leaves is not to think about each one individually. Think about how leaves look in groups.
They clump.

So make lots of little dots in yellows and oranges in clumps.
Look for the areas you added branches and make the density increase as you get higher in the tree.
As we always do with watercolor, start light and add darker colors on top.
Let your yellow clumps dry before you add some orange so you end up with different colored leaves, not blending all the leaves together into blobs.
Finally, I like to add leaves to the ground.

Add a few more yellow and orange dots along the base of the tree to show they've started to fall.
So Now What?
Congrats! You can now create easy birch trees wherever and whenever you want.
Try adding them to your next landscape or adorn a simple greeting card.
If you're looking for more simple watercolor projects, make sure you've signed up for my free watercolor ebook and follow along on instagram and subscribe on youtube.
Happy painting and stay creative!
-Alyssa


