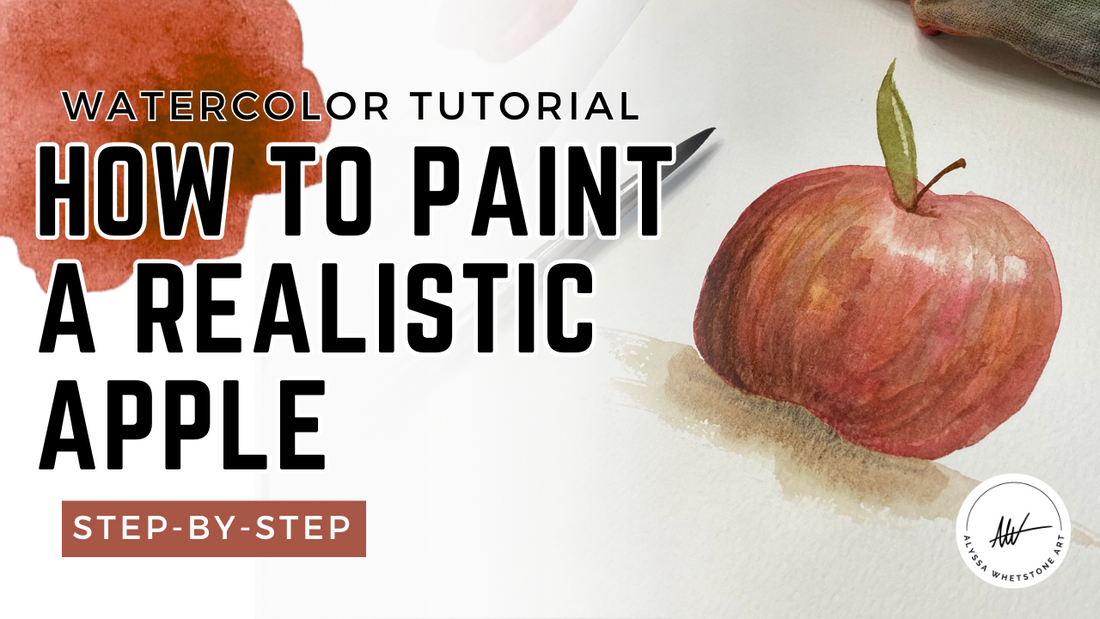
Wet-on-Wet vs. Wet-on-Dry: Painting a Realistic Watercolor Apple
Share
Painting an apple in watercolor might seem simple at first glance — after all, it’s just a round red fruit, right? But once you pick up your brush, you quickly realize an apple is actually the perfect subject for learning two of watercolor’s most important techniques: wet-on-wet and wet-on-dry.
When I sat down to paint apples recently, I started experimenting with different underpaintings — green, purple, brown — just to see how the base color would affect the final tones.
➡️ Then I layered colors wet-into-wet, letting red bleed into yellow ochre and brown for those juicy variations you see on a real apple.
➡️ Finally, I built depth and detail using wet-on-dry strokes: stripes, shadows, even that little indent at the top where the stem peeks out.
The combination of these techniques transformed a basic apple shape into something realistic and dimensional. And the best part? You don’t need a complicated subject or a dozen colors to practice — just a few paints, a brush, and a little curiosity.
In this tutorial, I’ll walk you through step-by-step how to paint a watercolor apple while practicing both wet-on-wet (for soft blends and smooth tones) and wet-on-dry (for sharp details and depth). By the end, you’ll not only have a lovely apple painting, but also a better grasp on how and when to use these two techniques in your future watercolor projects.
👉 If you’ve been searching for an easy watercolor apple tutorial or a beginner-friendly way to practice wet-on-wet vs. wet-on-dry, you’re in the right place.

Supplies You’ll Need
- Watercolor paper
- Brushes (size 8 round, size 2 round for details)
- Paints (red, yellow ochre, raw umber, sap green, optional black for shadows)
- Tissue or paper towel for lifting
- Cup of water and a palette
Why paint an apple in watercolor?
There’s a reason apples are a classic subject in art — they’re simple, familiar, and instantly recognizable. But beyond that, they’re the perfect practice project for watercolor beginners (and even experienced painters brushing up on technique). Here’s why:
-
Simple Shape, Big Impact
An apple is basically just a circle with a stem and a leaf. That means you can focus on experimenting with watercolor techniques instead of worrying about complicated drawing. -
Built-In Light and Shadow
Apples are round, which makes them an excellent way to practice creating form. You’ll see highlights, mid-tones, and shadows — all in one fruit! -
Just a Few Colors Needed
You don’t need a full rainbow of paints to make a realistic apple. With just red, yellow ochre, and brown (plus green for the leaf), you can create all the tones and variations you need. -
Practice Two Key Techniques at Once
Wet-on-wet gives you those soft, juicy blends that make the apple look fresh and full of life. Wet-on-dry adds the crisp shadows, veins, and texture that bring realism. Together, they make your apple pop off the page.
So while painting an apple might seem basic, it’s actually one of the best exercises to build confidence with value, layering, and watercolor control. Plus, you’ll end up with something cheerful and satisfying at the end — and who doesn’t love a shiny red apple? 🍎

Step-by-Step How to Paint an Apple
Step 1 – Wet-on-Wet Base Layers
- Paint the apple shape in watery red.
- Add yellow ochre and brown in a few areas while the paper is still wet.
- Tips: Avoid puddles, let colors blend naturally, and keep variety in tones.
- Optional: Lift highlights with a damp brush to create soft shine.
Step 2 – Wet-on-Dry for Depth
- Once the first layer is dry, add more red + brown to the shadow side.
- Use harder edges to suggest stripes, texture, or the indent at the top of the apple.
- Smudge or soften edges with a damp brush for a natural look.
- Key tip: Randomness = realism.
Step 3 – Adding the Details
- Stem: paint with a darker brown, letting it emerge from the shadow at the top.
- Leaf: mix sap green with brown for a muted tone, layer to add veins.
- Shadow: use diluted brown/black to ground the apple so it doesn’t “float.”

Wet-on-Wet vs. Wet-on-Dry — What You Learned
By the time you finish your apple, you’ve actually practiced two of the most important watercolor skills:
-
Wet-on-Wet for Softness and Blend
That first layer — painting red, then dropping in yellow ochre and brown while the paper was still wet — gave you those natural, glowing variations in color. Wet-on-wet is all about softness: no harsh edges, just smooth transitions that feel organic and alive. -
Wet-on-Dry for Depth and Detail
Once your base layers dried, you added stripes, shadows, and even the little indent where the stem comes out. Wet-on-dry let you control where the paint went, creating harder edges and sharper contrasts. That’s how you pushed your apple from “flat red circle” to something with dimension. -
Why Using Both Matters
On their own, these techniques can feel limiting — wet-on-wet can get too blurry, and wet-on-dry can look stiff. But when you layer them together, you get the best of both worlds: soft blends where you want them, crisp details where you need them.
This apple project shows exactly how the two techniques complement each other. And once you understand that balance, you can carry it into any watercolor subject — whether it’s fruit, flowers, or landscapes.
Painting an apple might look simple, but as you’ve seen, it’s a great way to practice some of watercolor’s most powerful techniques. By layering wet-on-wet for those soft, juicy blends and wet-on-dry for crisp details, you can take a basic circle and turn it into something dimensional and realistic.
Remember, your first try doesn’t have to be perfect (mine never are!). The more you practice, the more you’ll start to feel how much water is too much, when to let things dry, and where to add those finishing touches that make your painting come alive.
🍎 Want to watch the full process in action? Click here to watch my step-by-step watercolor apple tutorial on YouTube.
And if you’re looking for even more inspiration to keep your brushes moving, I’ve put together 30 free watercolor painting prompts — quick, creative ideas to help you paint more often and build confidence. Grab your free prompts here and let’s keep painting together!
See you over on my instagram for weekly watercolor ideas and inspiration!
Stay creative!
-Alyssa


