Easy Valentine’s Day Watercolor Card: Latte Coffee Art Tutorial
Share
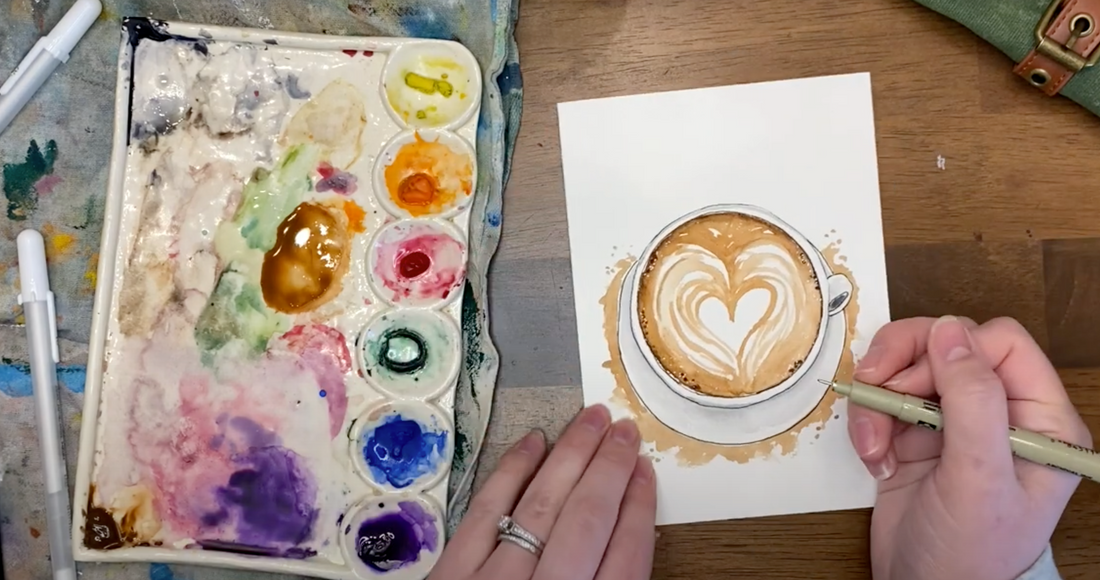
There’s something about a cozy latte that just feels like love in a cup—So for Valentine’s Day this year, I decided— what better subject to paint than a coffee topped with heart-shaped latte art? This watercolor project is equal parts charming and beginner-friendly.
Instead of stressing about drawing a perfect circle or complicated foam designs, we’ll use simple tricks— like stamping the cup with a mason jar and painting around the heart shape with negative space—to create a design that looks impressive without being complicated. Along the way, you’ll learn how to mix the perfect warm latte brown, add realistic bubbles, and even turn your painting into a handmade Valentine’s card.
Whether you’re brand new to watercolor or just looking for a festive project to paint, this tutorial is a sweet way to practice your skills while creating something you can gift to someone special (or keep for yourself!).
If you prefer to learn via video, you can watch the full tutorial on YouTube and you'll find the link at the bottom of this blog post.
Supplies You’ll Need
-
Watercolor paper (card format if making it into a greeting card)
-
Watercolor paints (browns + orange for mixing)
-
Mason jar or non-porous round object for stamping the circle
-
Brushes (medium round + detail)
-
Pencil & eraser
-
White gel pen (optional)
-
Black pen for outlining (optional)
-
Water & paper towel

How to Paint a Latte in Watercolor
Step 1: Stamp the Latte Circle
-
Paint the rim of a mason jar with brown and stamp it onto the paper.
-
Note: it won’t be a perfect circle—small gaps make it look natural.
Step 2: Mix the Perfect Latte Brown
-
Start with brown, then warm it up by mixing in some orange to make a realistic latte color.
-
Variation in shades makes the piece more interesting.

Step 3: Paint the Negative Space of the Heart
-
Leave the heart white while the coffee is painted around it.
-
Pull the brown paint inward, following the stamped circle.
-
Add flowing, curved strokes to mimic how coffee swirls when latte art is poured.
-
Create a defined heart shape in the center.
Step 4: Add Texture and Bubbles
-
Smudge some edges with a damp brush for softness.
-
Use the tip of the brush to dot small “bubbles” around the edge.
-
Add contrast by varying the lightness/darkness of these details.

Step 5: Paint the Cup and Plate
-
Lightly sketch the cup rim, handle, and plate to guide placement.
-
Use diluted gray to suggest shadows while keeping the cup “white.”
-
Fade the gray outward so the plate feels dimensional.

Step 6: Create the Background
-
Add a soft brown wash around the plate.
-
Use wobbly, loose edges to suggest a table, spill, or cloth.
-
Optionally add scattered dots for a playful, splattered effect.
Step 7: Finishing Touches
-
Optional: add white gel pen dots to balance the bubbles.
-
Optional: trace select edges with pen for an illustrative look.
-
Leave room at the top of the card for a Valentine’s message.
You did it!
And there you have it—a sweet and simple watercolor latte, complete with a heart-shaped swirl of foam. It’s the perfect little project to celebrate Valentine’s Day, practice painting negative space, and create something gift-worthy at the same time.
Want to see the full process in action? 🎥 Click here to watch the video tutorial and paint along step by step.
If you loved this project and want more ideas to keep your brushes moving, I’ve put together 30 free watercolor painting prompts just for you. They’re designed to spark creativity and help you build confidence, even if you only have a few minutes to paint. You can grab them right here and keep your creativity flowing long after this latte dries.
Happy painting—and cheers to cozy cups and handmade cards! ☕❤️
-Alyssa


